DIY car detailing is a great project to take on if you love your car and want to save money. We’ll show you how to do it from top to bottom.

Plan Out the Wash
The key to a successful DIY car detailing job is to set yourself up for success from the start. Before you actually start washing your car, you should gather the right tools for the job and plan out your strategy to optimize your time and effort.
Opt for Microfiber Tools
Sponges capture and hold dirt and grit in their large pores. You can wring yours out, but the grit will stay put when car cleaning. Once grit is embedded, you may as well wash your car with sandpaper. Detailers use a microfiber car wash mitt because the grit falls out when you rinse, it’ll make a do it yourself car wash that much better.
Chamois soak up water, but they don’t pick up any grit that’s left after rinsing. Instead, they just grind those particles into your paint. A microfiber towel, on the other hand, collects the particles. Rinse the towel in clean water to remove the grit. Then wring and keep drying.
Wash With the Right Suds
Even though hand dish washing liquid is a great degreaser, it’s not the thing to use on your vehicle’s finish. Yes, it removes dirt, grease and old wax. But it also sucks important oils right out of the paint’s finish. Use it repeatedly and you shorten the life of your paint job. Car detailing professionals use a different soap, and you should to if this is on your DIY list.
Instead of dish soap for a do-it-yourself car wash, use a cleaner formulated for vehicles. Once you’ve mixed the suds, fill a second bucket with clean rinse water. Use it to rinse your wash mitt often. That’ll remove most of the road grit from the mitt to prevent scratches.
Rinse Before Washing
If you hit your dry paint with soapy water, you’ll just grind the surface dust and road grit into your paint finish. Professional detailers always start with a clear water rinse to remove as much dust and dirt as possible.
Slide Seats Forward and Clean Out the Junk
You’ll be surprised by what you find behind the seats. We found a lost cell phone, enough pens and pencils to equip a small office, and enough change for several vending machine lunches. Vacuum the seats, remove the mats and vacuum the carpet. Use a brush attachment for the dash and door panels. Don’t forget to clean out and vacuum those handy door pockets as well.
Vacuum As You Go
Most DIYers start cleaning the interior by shampooing the carpet. That’s a mistake—you’ll just get it dirty again as you clean the upper surfaces. Instead, start at the top and work your way down. Vacuum the headliner, dash, console and door panels. Then clean all the glass, and dust the nooks and crannies. Sweep the dust out of the cracks with a detailing brush.
Finish With the Glass
If you cleaned the inside of your windows before you cleaned the dash and applied vinyl protectant, you’ll just have to clean them again. That’s why detailers save glass cleaning until the very end. Cleaning the windows at this point removes all cleaning and vinyl treatment overspray and leaves you with sparkling clean windows.

Take Care of Your Leather
Leather interiors need special attention; they are one of the more meticulous aspects of DIY car detailing. You’ll want to clean yours regularly and repair it as needed to elongate its life as much as possible.
Clean the Leather
This may sound extreme, but if you’ve got leather upholstery, buy a leather-cleaning kit and keep it in the vehicle. If you clean spills right away, you increase your chances of a complete cleanup. If you wait, lipstick, ink and dye transfers from clothing and plastic shopping bags can set permanently in as little as 24 hours.
Pretreat the leather with a conditioner before you start the stain removal process. Wipe the ink lifter directly on the pretreated leather and rub it in. Let it sit for 30 seconds, and wipe it with a clean cloth. Then apply leather cleaner and the leather protection cream.
Fix Tears in Leather Seats
Bad tears require the attention of a professional. But if your tears are small, and you want to save some money, you can repair them yourself. A leather/vinyl repair kit is inexpensive, and the repair takes only an hour. But don’t expect perfection. You’ll still see the tear, and you probably won’t get a perfect color match. However, this fix will contain the tear and look better than a gaping hole.

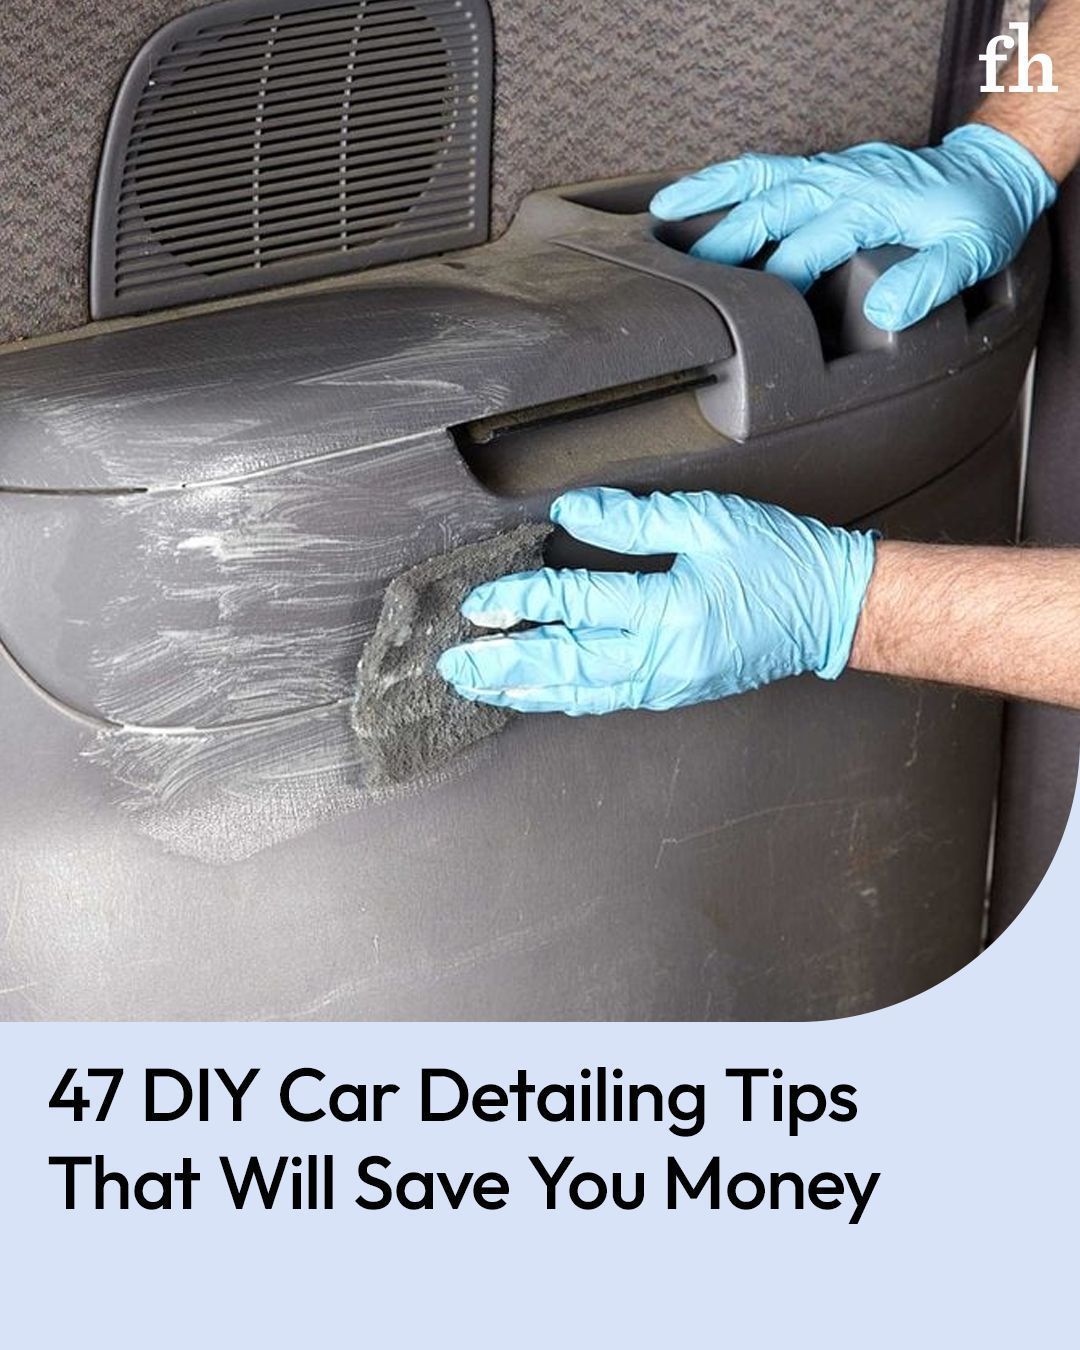
Plastic and Vinyl
The plastic and vinyl in your car needs attention during your DIY car detailing process too. A little elbow grease goes a long way to keeping these materials looking fresh and clean.
Washing
Apply SEM Soap to vinyl and plastic surfaces and scrub with a scuff pad. Put extra effort into textured and recessed areas. Wipe the surface with a clean, damp, lint-free cloth and let dry.
Colorant
Spray on several light coats of colorant, allowing 5 to 10 minutes between coats. Let the colorant dry for 24 hours before using.

Brush Out the Air Vents
Louvers are a real magnet for dust, and a vacuum with a brush attachment just won’t get it all. Take an inexpensive artist’s paintbrush and give it a light shot of furniture polish. Work the brush into the crevices to collect the dust. Wipe the brush off with a rag and move on to the next one.

Remember to Clean Nooks and Crannies
When you’re doing a DIY car detailing job, finding and dealing with all the trim lines and recesses that a quick once-over cleaning job misses is part of the description. Wrap a cloth around an old, worn screwdriver (without sharp edges) and spray an all-purpose cleaner on the cloth. Move it gently along the trim lines to pick up the gunk. Keep refreshing the surface of the cloth. Go around all the buttons and controls as well; then follow up with a rejuvenator.

Clean The Carpet, Upholstery and Velour
Your carpet and upholstery take quite a beating. Dirt, stains, even sometimes odors all collect in that fabric. Cleaning these surfaces will keep your car looking, smelling, and feeling fresh.
Wash Carpet and Velour
Spray Plastic & Leather Prep on the carpet or velour and scrub lightly with a nylon bristle brush. Let dry and vacuum.
Carpet and Velour Colorant
Apply colorant to the carpet or velour and immediately brush in all directions with a nylon bristle brush to keep the fibers separated. Let dry. Then brush again and vacuum.
Brush and Vacuum Your Carpet
Automotive carpet doesn’t like to let go of dirt when you’re car cleaning. Vacuuming is a great start, but if that’s all you do, you’ll leave plenty behind. To remove more dirt, detailers use a stiff brush and scrub the carpet as they vacuum. You’ll see the dirt particles bounce to the surface so you can suck them up with your shop vacuum as part of your auto detailing.
Deep-Clean Carpet and Upholstery
If the vacuum and brush combination doesn’t cut it, don’t worry. Use a carpet cleaning machine to get the deep dirt that settles into the fibers of the carpet and cloth seats. It sprays the carpet with a solution of water and cleaner and then sucks the dirt and grime into a reservoir. A machine like this pays for itself after just a few uses. You can also rent one from a rental center or use a spray-on cleaner and a scrub brush instead.
Replace the Carpet in Your Vehicle
In some cases, like if you bought a “preowned” vehicle, the carpeting in the car is simply a disaster. If it’s too far gone for stain removers, new carpeting is the best solution. You can buy preformed carpet specifically for your car’s make, model and color and install carpet yourself.
Replace Seat Covers
Whether you fill your vehicle with construction materials, haul kids and grandkids around or just spill lots of coffee, you know how easy it is for factory seat covers to get grungy. And just like the carpet, there are times when the upholstery in your car is too far gone. If they’re beyond rescuing with an upholstery cleaner and you want to spruce up your vehicle’s interior, you have only three car detailing options: pay a professional automotive upholsterer to reupholster your seats, buy used seats from a junkyard, or buy and install seat covers yourself.
Aftermarket seat covers are the cheapest of these three options. The installation is similar across makes and models. The job takes about two hours for front and rear seats. The only tools you’ll need are a wire coat hanger and some tape to fish the straps under plastic trim pieces. Everything else is included with the seat covers.

Refinish Wheels
Sometimes a middle-aged car can still look fine except for wear and tear on the wheels and wheel covers. Fortunately, you can fix this yourself for little cash. Removing the rust and painting your wheels take a full day—mostly you’re waiting for paint to dry. Then the wheels must dry for 24 more hours after painting before you remount them.

Repair Paint Chips and Protect the Finish
Drive your vehicle for long enough and you’re sure to get caught in a windy area or behind a vehicle kicking up dirt and rocks. Now you’ve got several tiny chips in your paint finish that could grow to quarter-size rust spots in a few years. This is one of those tasks that immediately springs to mind when discussing car detailing, and believe it or not you can DIY this one too.
Pluck the Finish
Your vehicle’s clear coat deflects some of the debris but can hold the sharper grit. Washing removes the surface dirt, but clay-barring is the only way to pluck out the embedded stuff.
Buy a clay bar kit that includes a lubricating spray and several pieces of synthetic clay. Prepare the clay by tearing a piece into four sections. Flatten one section into a small pancake in the palm of your hand and rub it over the paint with a back-and-forth motion. Fold the clay against itself, knead it and reflatten until the clay turns gray. Then toss it and use a fresh piece until you remove the “darts” and get a glass-like finish.
Repair Small Paint Chips
Take care of this problem right away and you’ll save yourself big money later on, not to mention the embarrassment of driving a premature clunker. With the right primer and touch up paint, you can fill in these chips yourself. Be sure to clean and then de-grease the spot first so that your primer and paint stick correctly.
The fix we discuss here is for fresh chips that haven’t started to rust yet. If you see a rust spot, or have a dent along with your chip, you’ll need to do a more challenging fix. Keep in mind that this repair will be visible under close scrutiny, but if you buy the right touch-up color, it’ll be unnoticeable from a few feet away.
